The Google Analytics service offer page view events tracking automatically whenever a visitor loads a page, this data may be enough for most users, but knowing how many users clicked a specific element in the page can give you more insights about the performance of your content.
To track clicks of a button as an example, you need to log a click event when the user clicks on the button using javascript and the Analytics API. this is easy if you have just one element to track, you can wite hardcoded Javascript code that calls the gtag() function with defined value for the event properties.
However, if you want to track more than one element, with each having its own event properties and values, you must either use conditions for each element or use data attributes to store these event variables and manage them for each element you create.
In this tutorial, we will cover adding and using HTML5 data attributes to any Oxygen element that you want to track its events.
Register attributes for trackable elements
Using our easy to use attributes manager, you can register as many attributes as you want for any component, for example, to track clicks of buttons you need to add the following attributes:
Tracking toggle
Let's begin by adding a checkbox attribute that will show and hide the other data attributes of event tracking.
Notice the attribute value is set to NULL all caps, this will make it a boolean attribute that has no value.
| Label | Enable tracking |
| Attribute | data-event |
| Target Components | Button |
| Field Type | Checkbox |
| Checked Value | NULL |
| Unchecked Value | Set empty value |
Event Category
This is the group name you give the elements you want to track (e.g. videos, buttons, PDFs).
| Label | Event category |
| Attribute | data-event-category |
| Target Components | Button |
| Field Type | Text field |
| Field Condition | data-event!= |
Event Action
The event action represents the type of user interaction you want to record (e.g. downloads, plays, clicks).
| Label | Event action |
| Attribute | data-event-action |
| Target Components | Button |
| Field Type | Text field |
| Field Condition | data-event!= |
Event Label
Using labels, you can send additional information for the events that you want to analyze, such as movie titles in videos, or the names of downloaded files.
| Label | Event label |
| Attribute | data-event-label |
| Target Components | Button |
| Field Type | Text field |
| Field Condition | data-event!= |
If you want to know more details about any of the previous parameters for events tracking, please check out this detailed article in the Google Analytics help site.
Using these Attributes

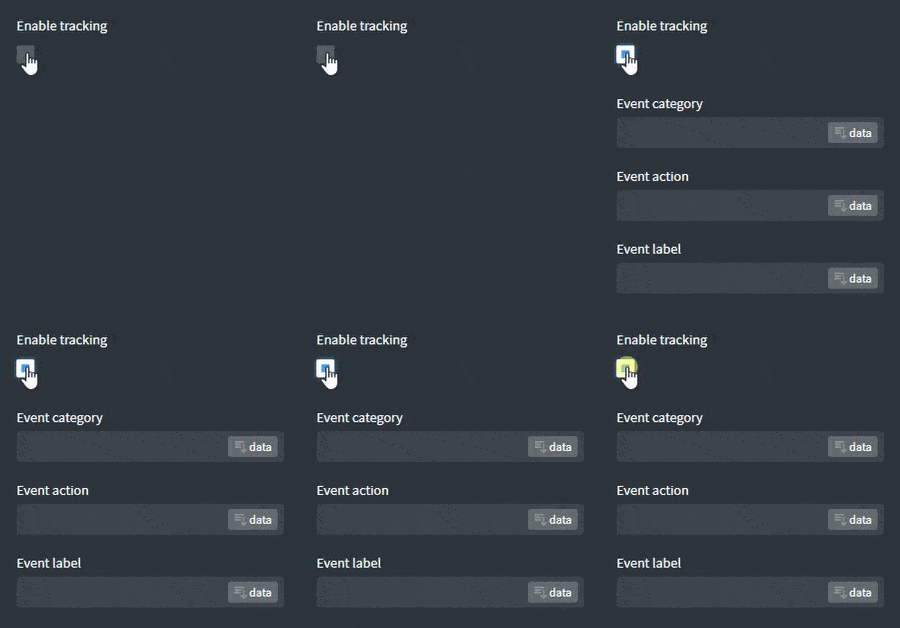
Now, if you want to track clicks for a button, simply check Enable tracking and enter the event details in the attributes fields.
If you have noticed, we added a field condition to each of the last three text fields with data-event!= as a value, basically, this will tell Oxygen to show the fields only if the data-event attribute has a value, in our case, if the enable tracking checkbox is checked. This will help you keep the elements editing interface clean.
Handling elements click via Javascript
In this section, we will add Javascript code using an Oxygen code block element, preferable to add it at the very bottom of your main template.
!function($) {
$("body").on("click", "[data-event]", function() {
var category = $(this).data('event-category');
var action = $(this).data('event-action');
var label = $(this).data('event-label');
if (category && action && label) {
if (typeof gtag == "function") {
gtag("event", action, {
"event_category": category,
"event_label": label
});
} else {
ga('send', 'event', action, category, label);
}
}
});
}(jQuery);
Code language: JavaScript (javascript)That's it, hope this guide can help you know more details about the behavior of your visitors and their reactions to different elements on your site so you can optimize the conversion.
